Projects
A project is one Skin Analysis experience. Its design, products, questions and recommendations all belong to the project. Create a separate project for each website, market or use case.
Create a project
-
In Studio, go to Skin AI → Projects.
-
Click + at the top right.
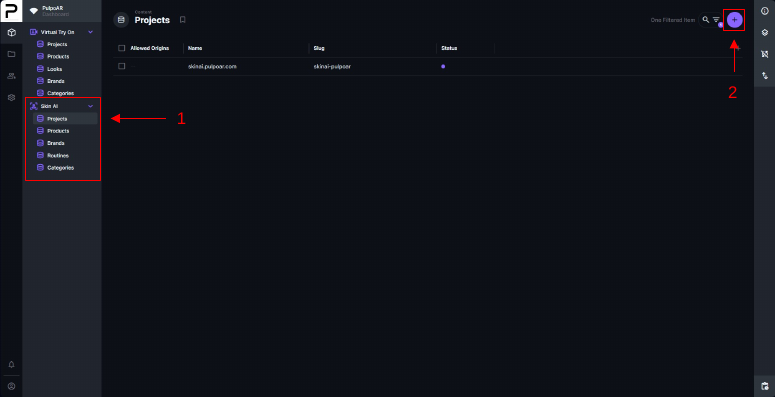
-
Fill in Name and Slug (both required), and the other fields you need.
-
Save, then open the project from the list.
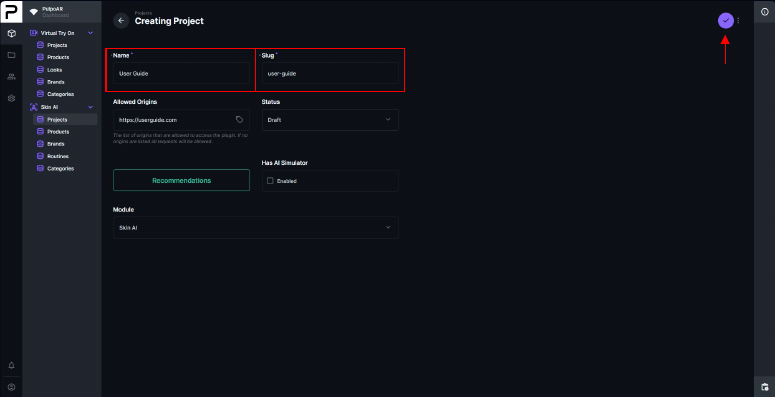
Project fields
| Field | Description |
|---|---|
| Name | The name you see in Studio. |
| Slug | A unique, lowercase, hyphenated identifier, for example brand-fr-skincare. It appears in the integration link: https://plugin.pulpoar.com/skinai/brand-fr-skincare. |
| Allowed Origins | The websites allowed to show the experience. If empty, it works on any website. |
| Status | Published makes the experience live. Draft turns it off without deleting anything. Archived hides a project you no longer use. |
| Has AI Simulator | Turns the AI Simulator on for this project. |
Don't change the slug after launch
The slug is part of the integration link. Changing it breaks every website and app that uses the slug.
Tips
- Choose a slug that describes the project, for example market, brand and use case.
- Keep the project in Draft until it's set up and tested.
- Always set Allowed Origins before going live.