Projects
A project is one Makeup Virtual Try-On experience. Create a separate project for each website, market or use case, so each one has its own catalog, design, allowed websites and analytics.
Create a project
- In Studio, go to Virtual Try On → Projects.
- Click + at the top right.
- Fill in the project fields (see below) and save.
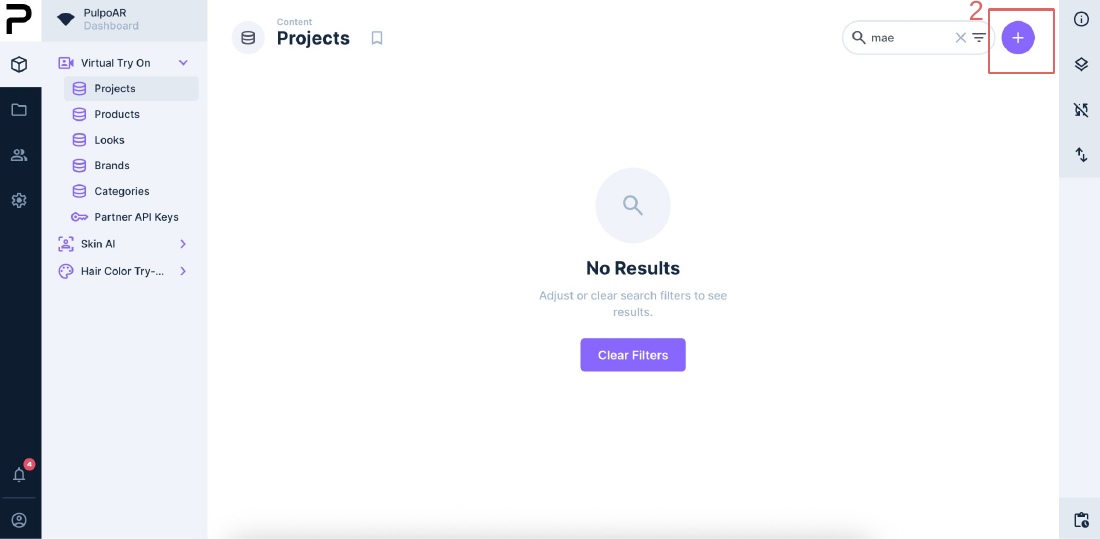
To open an existing project, search for it by name on the Projects page.
Project fields
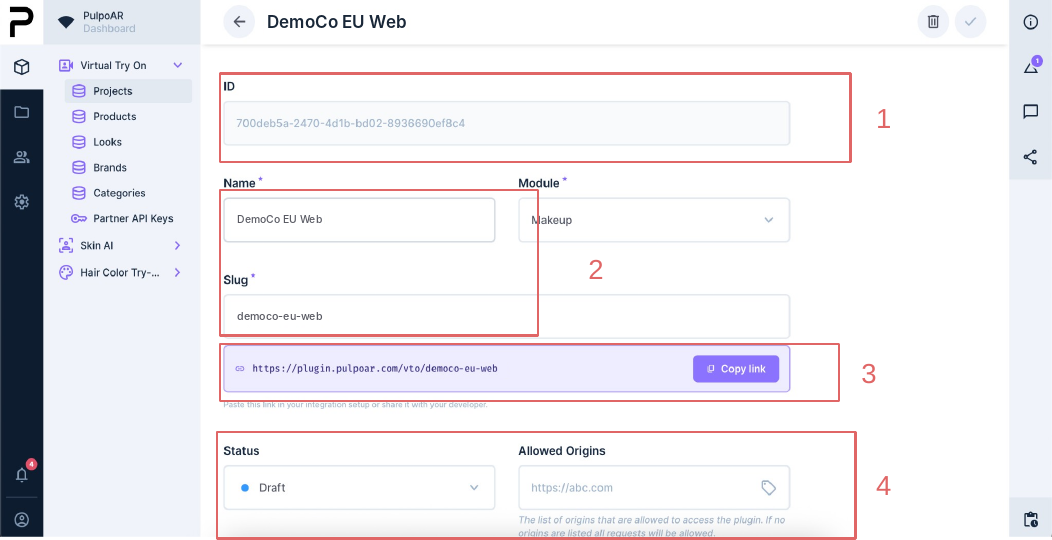
| Field | Description |
|---|---|
| ID | Assigned automatically. |
| Name | The name you see in Studio. |
| Slug | A unique, lowercase, hyphenated identifier, for example brand-eu-web. It appears in the integration link. |
| Module | Set to Makeup. |
| Integration link | Created automatically, for example https://plugin.pulpoar.com/vto/brand-eu-web. This is the link your developers embed. |
| Status | Published makes the experience live. Draft turns it off without deleting anything. |
| Allowed Origins | The websites allowed to show the experience. If empty, it works on any website. |
Don't change the slug after launch
The slug is part of the integration link. Changing it breaks every website and app that uses the slug.
Tips
- Choose a slug that describes the project, for example market, brand and channel:
brand-eu-web. - Keep the project in Draft until it's set up and tested.
- Always set Allowed Origins before going live.
Duplicate a project
To set up a new market quickly, duplicate an existing project.
-
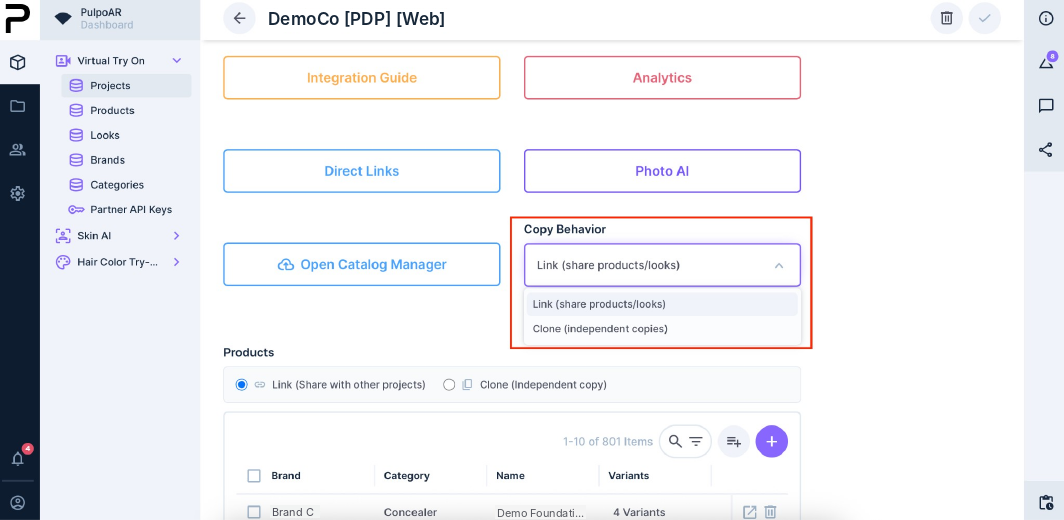
Open the project and choose a Copy Behavior:
- Link: the copy stays connected to the original. Changes in one apply to the other. Use it when both projects must always match.
- Clone: the copy is fully independent. Use it when each market will manage its own catalog and design.
-
Change the Name and Slug. Both must be unique, for example add
-us.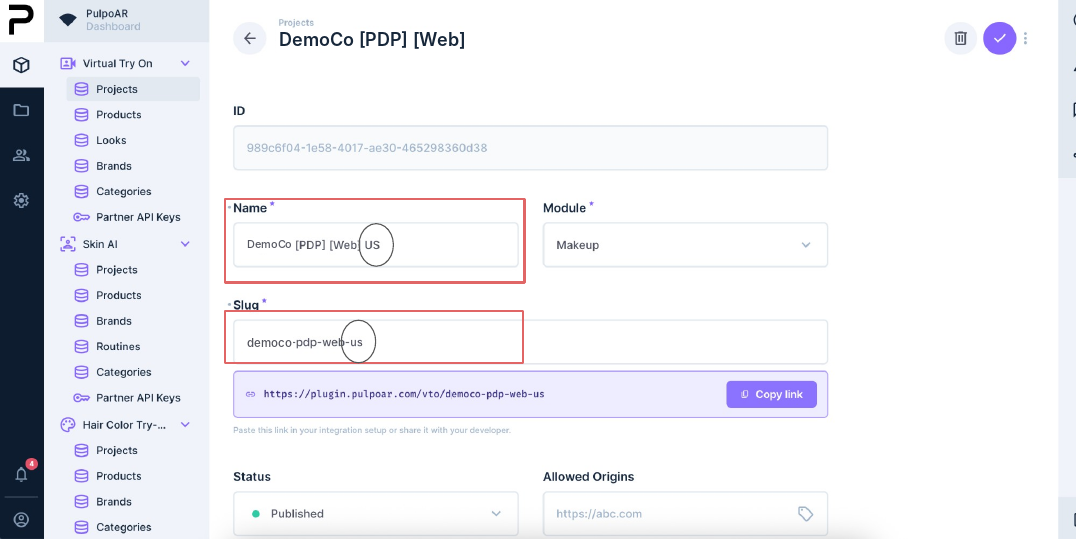
-
Open the ⋯ menu at the top right and click Save as Copy.
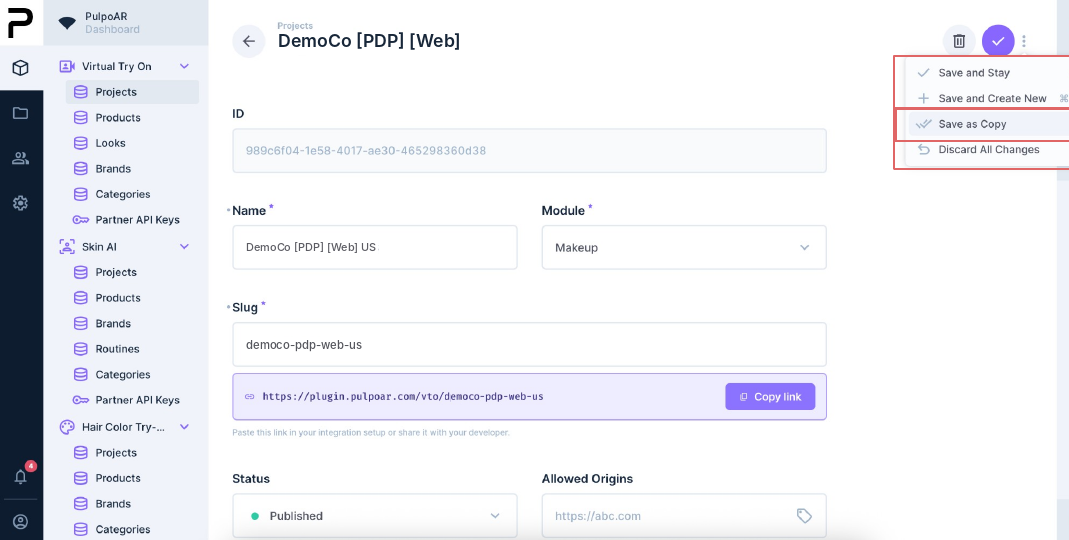
The new project appears in your Projects list.
For developers
Your developers need the project slug or integration link. See Embedding the plugin.