Products and variants
Your catalog has four levels:
Brand → Category → Product → Variant
A product is a product line, for example "Velvet Matte Lipstick". A variant is one shade of it, for example "Red 003". Customers try on variants.
This page shows how to add items one at a time. To add or update many items at once, use the Catalog Manager.
Add a product
-
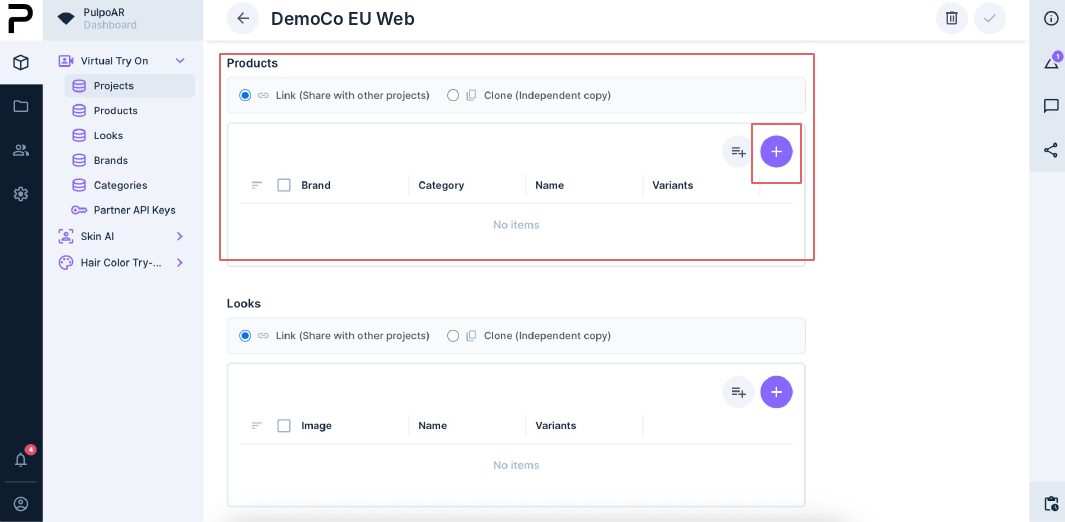
Open your project and scroll to the Products table.
-
Click +.
-
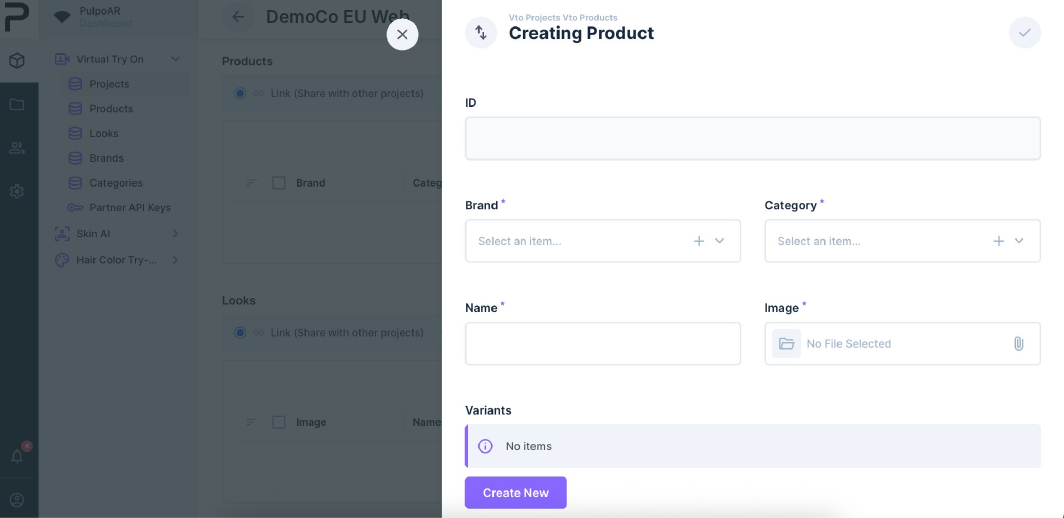
Fill in the required fields:
- Product name
- Brand: pick one, or click + to create it.
- Category: pick one, or click + to create it.
- Image: shown in the catalog.
-
Save.
You can also manage brands and categories from the Brands and Categories pages in the left menu.
Add a variant
-
Open the product and scroll to Variants.
-
Click Create New.
-
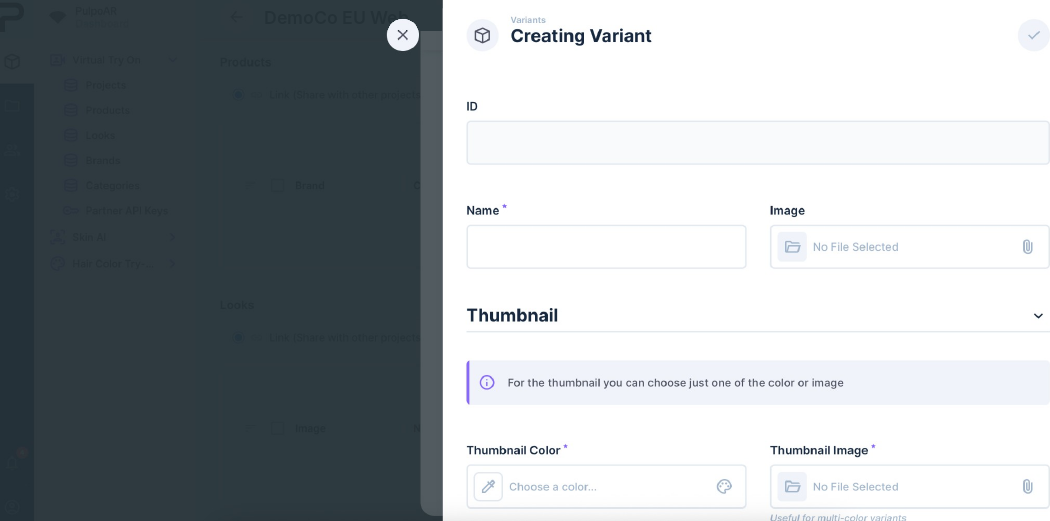
Fill in the name, image and thumbnail color.
-
Digitalize the variant.
-
Fill in the identifiers:
| Field | Description |
|---|---|
| Barcode | Your EAN/UPC. Use the same value as in your own product system. |
| Slug | A unique, lowercase, hyphenated identifier. Using your SKU keeps systems aligned. |
| Web Link | Your product page. Customers go here when they click Go to Product. Add to Cart doesn't use it: your developers connect it to your cart. |
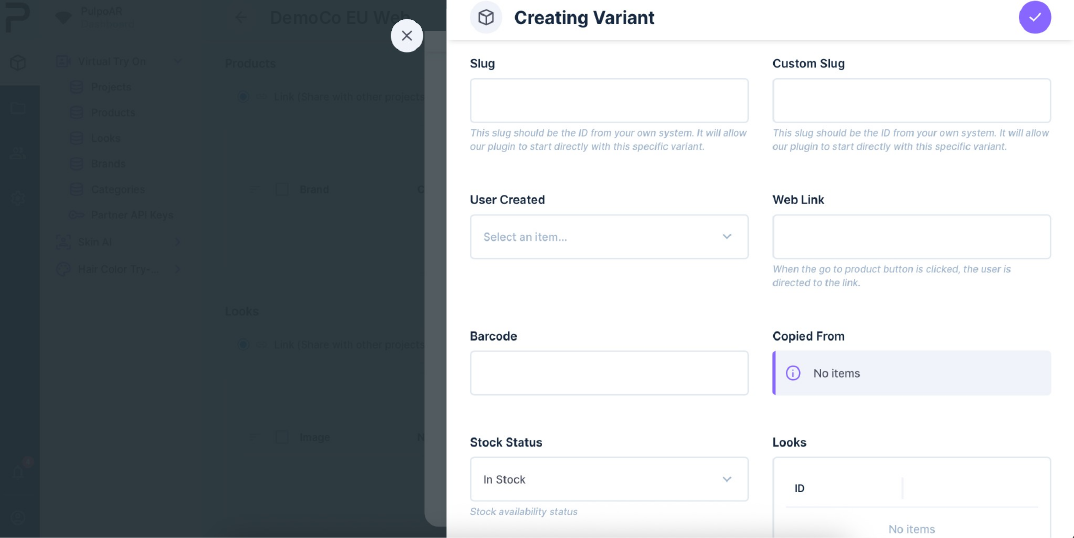
- Click Save.
Studio doesn't save automatically. Unsaved changes are lost when you leave the page.
Manage products in a project
From the project's Products table you can:
- Open a product to edit it or its variants.
- Set its status to Draft to hide it, or Published to show it. See Stock and status.
- Remove it from the project.
Automate this
To keep your catalog in sync with your own product system, your developers can use the Partner API. For how slugs are used in code, see Identifiers.