Web
1. Importing Plugin#
You can directly import plugin into your project. No need to import any file to your projects. Just insert iframe with below configurations.
src: URL of our website.allow: Camera permission must be given. Otherwise camera can not be open. Visitor choose only model or pick image from device.onload: Some informations are must be provided to webview. These informations are defined in below.
2. Structure#
Basically we need one iframe and color buttons. Any design can be created with this plugin. We uses product names to apply them. Product informations are stored in our pms system. To apply any product, The only information you need is product code.
When iframe loaded some informations are must be provided. Comminication between iframe and your site provided by post messages.Post message contents are includes function name and parameters. It can be tested on your localhost. But you need to give us your domain name for production. Unrecorded subdomains are not allowed for security issues.
3. Functions#
You can see very simple usage of our plugin. Iframe is center of page and color buttons below. When web page is loaded init function runs with website_id parameters. Without these information plugin does not works.
Will be used on iframe load
postMessage is must be called to execute functions in iframe.
You must initialize plugin first. Initialization takes your website and it can be usable for only your domain or package.
You can set first product in 2 different ways.
You can use product code
set_active_products_by codetakes json string parameter. Active product dictionary consist of least three keys and values.Market Place Code
specialProductId: Takes 13-digit integer value which is the global id of this product provided by us.specialBrandCodeName: Code that special for brand. This code help us to give special product code to brand.
caution
There is option to use and design your own camera ui. In this scenario you can create camera ui. And only result is shown by our ui.
caution
If you want to use different blusher or eyeliner type, You must add key value pair to activeProduct dict.
You can select different style for eyeliner and blusher#
Eyeliner#
- Example usage of eyeliner types
| Eyeliner Type 0 | Eyeliner Type 1 | Eyeliner Type 2 |
|---|---|---|
 | 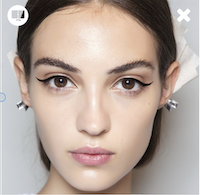 | 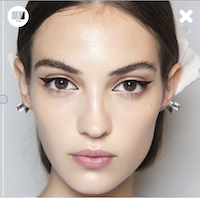 |
Blusher#
- Example usage of blusher types
| Blusher Type 0 | Blusher Type 1 |
|---|---|
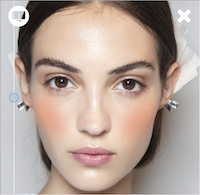 |  |
Only use result screen
In this scenario when page load or photo captured, photo must be provided with below function.
Will be used on product selection
There is two option to apply any product. You can use product code or product name that consist of brand name, product name and color name.
applyProductWithSpecialProductCodetakes one argument. Product code is unique id that matches with special product code. You should integrate our product code list to your app or website. Product code list will be shared.
applyProductWithCodetakes one argument. Product code is unique id that matches with product. You should integrate our product code list to your app or website. Product code list will be shared.
removeProducttakes only category name.
Plugin files#
Mail us to to get website-id and our plugin URL. You can get contact from here